Build A Birdhouse With Your Kids (Pentagon Birdhouse)
Designed by BetteringDads.com
Power tools and equipment are dangerous, careful supervision is required when building things. Adult supervision is required.
Spring is in the air and birds are starting to sing the song of parents. One way to enjoy the birds, and memory lasting time with your kids, is to build a bird house.
At the end of this post is a PDF download if you want to skip the write up. If you want to stick around. We have listed the steps to help you step through the process.
Step 1 - Gather the Material For The Birdhouse
Item | Quantity | Description |
|---|---|---|
1x12 Pine | 4' | Recommend Pine Board |
Casing Nails | 24 | 4d - 1-1/2" |
Electrical Wire | 2 | 18" |
Eye Ring | 2 | 1/4" x 1" |
Wood Glue (Optional) | Globs | Wood Glue |
Step 2 - Gather the Tools For The Birdhouse
Tool | Quantity | Description |
|---|---|---|
Hammer | 1 | Pound Nails |
Saw (Table, Circular, Hand) | 1 | Cut Boards |
Pliers | 1 | Ply Things |
Impact Drill or Similar | 1 | Drill Holes |
Drill Bit | 1 | 1/8" Wood Bit |
Clamps | 2 | 12" Adjustable Clamps |
A Hole Saw or Paddle Bit | 1 | 1-1/2" to 2" Hole Saw |
A Sharp Pencil | 1 | Writing and Marking |
A Compass | 1 | Laying Out Pentagon |
A Tape Measure | 1 | Measuring |
A Square | 1 | Drawing Straight Lines |
Step 3 - Cut List For The Birdhouse
Shape | Quantity | Description |
|---|---|---|
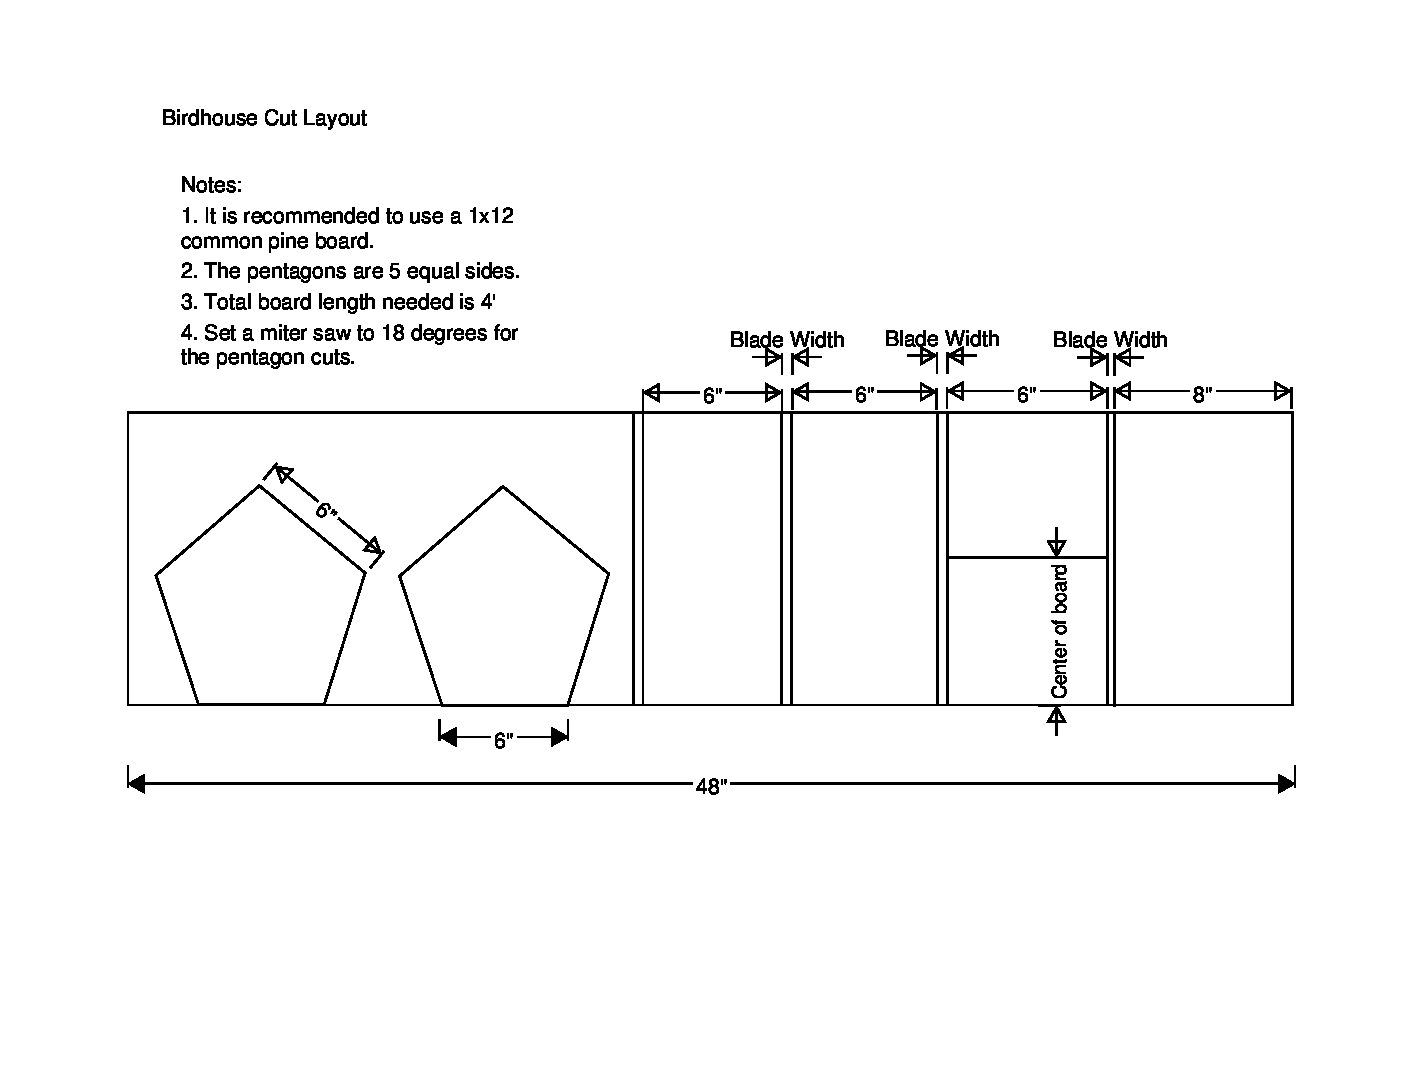
Rectangle #1 | 1 | 8"x12 (nominal size) |
Rectangle #2 | 2 | 6"x12 (nominal size) |
Pentagon | 2 | 6" per side |
Square | 2 | 6"x6" |
Step 3 - Layout and Measure Up The Pentagon, Walls and Roof
Set the pine board on a flat surface and mark out where the cuts need to go. Ours look like this:
Drawing a Pentagon
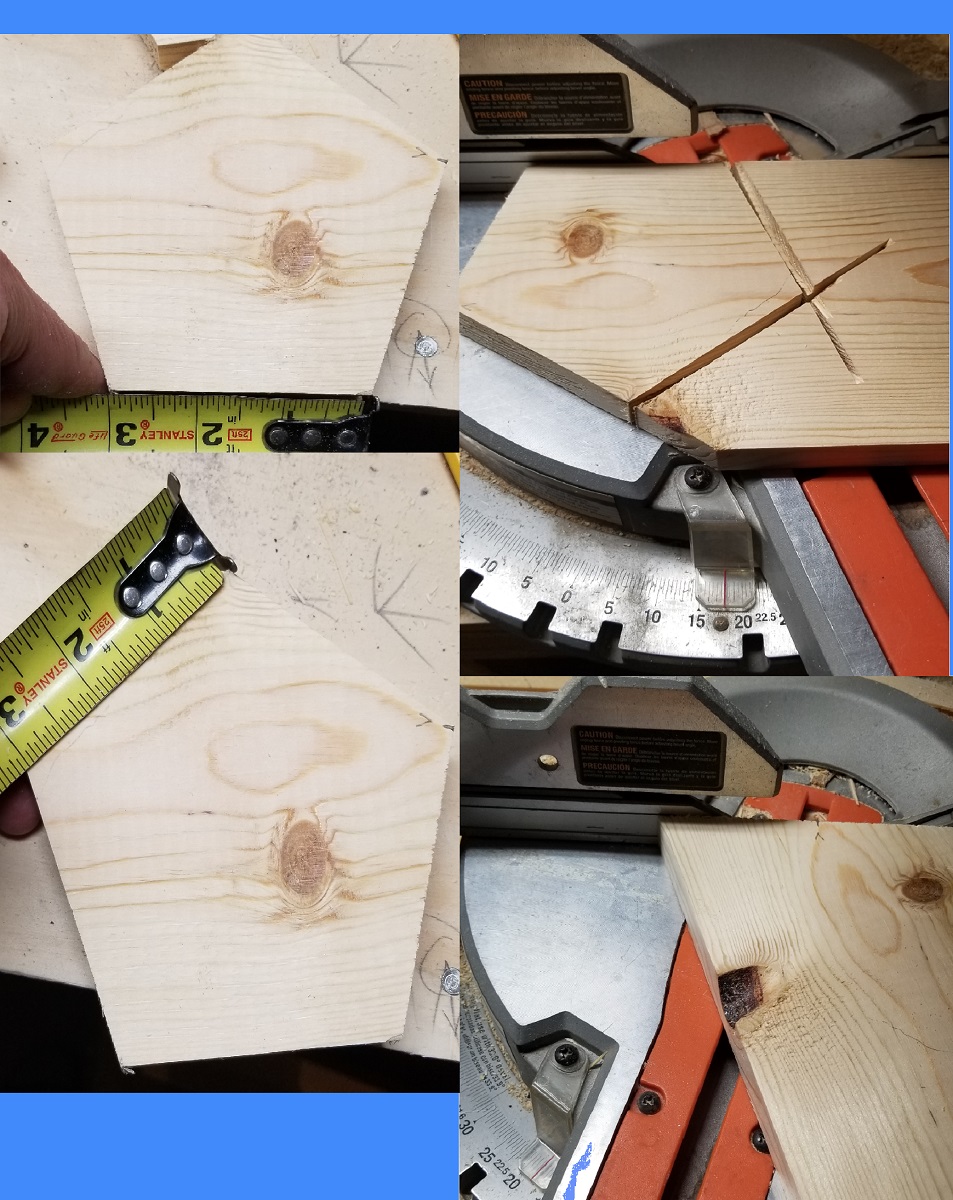
There are a lot of different methods to drawing a pentagon. We have included a template for a 6", equal sided, pentagon here. Just pin the corners, remove the template and trace the lines. For point "E" measure 6" from D to the center line of the pentagon.
Draw An Equal Sided Pentagon with 18 Degrees
If you want to learn how to draw a pentagon using only a square, here is a simple method.
Step 4 - Make the Cuts On The Layout
Using a hand saw, table saw or circular saw (skill saw), cut the boards. If the edges are rough, sand them to remove the burrs. We did not sand the final pieces other than to remove the splinter hazard. That is why we bought finish grade wood so it already looked pretty!!
Step 5 - Assemble The Pentagon Birdhouse
1. Drill a hole in one of the face panels
2. Assemble the two sides and face panels with clamps. Glue can be used on the seams if desired. Set the clamps to hold the sides and face together.
3. Use some scrap cuts to prop up the clamped pieces if needed. Hammer into the face panels about 1/4" from the edge being sure to keep the nail straight. A slight angle to the inside of the birdhouse would be appropriate if not using glue.
4. Flip and rest the birdhouse on some scrap or hang the clamps over the edge of the working surface. Repeat the hammering process for the opposite side.

5. Set the four walls upside down. Position the floor so the pentagon side with the hole has a "deck" by flushing the back side of the floor piece with the back wall pentagon face. Nail on the floor keeping the nails at between 1/4" and 1/2" from the edge. Try to keep them straight or at a slight angle.
6. Flip the birdhouse so the floor is on the working surface. Grab the large roof and the small roof pieces. Set the small roof on one side and butt it into the underside of the larger roof. There will be a small gap because these are not 90 degree angles. Be sure to give the overhang to the "deck" side of the birdhouse.
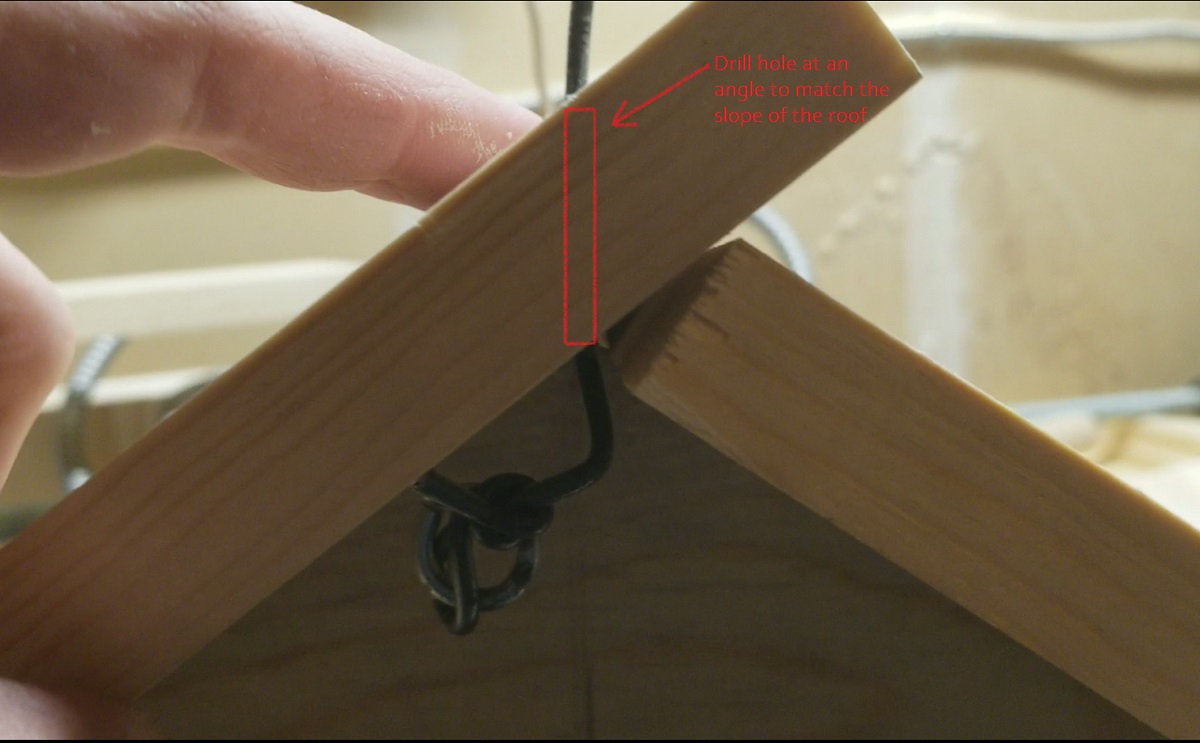
7. Set the larger roof on the birdhouse and mark about two inches from the edge of the roof toward the inside at the peak of the pentagon. Mark the same location from the back side on the large roof. Drill a hole 1/8" to 3/16" in diameter for the hanging wire. This drill hole will be at an angle, perpendicular to the floor. If needed, take a cut piece from the pentagon scrap and set it on the working surface. Place the roof piece with the outside eave at the working surface and the mark elevated on the cut piece. Place the drill bit on the mark and drill perpendicular towards the working surface. Repeat for both holes.

8. Screw in the eye ring about a 1/2" away from the hole towards the eave. Insert one end of the hanging wire into the eye ring and twist the wire around itself at least four times. Poke the opposite end of the wire through the hole and pull it until snug. Repeat for opposite side.
9. Fasten the roof piece in similar fashion previously, maintaining the nail distance from the edge at least 1/4", keeping the nails relatively straight.
10. Hang the bird house in a location that you desire. Keep in mind that birds don't like to be bothered. Best to put it up high in a safe place. Like a tree using a ladder. Never attach a bird house to a power pole, telephone pole, lamp post or any other pole that provides a utility service.


